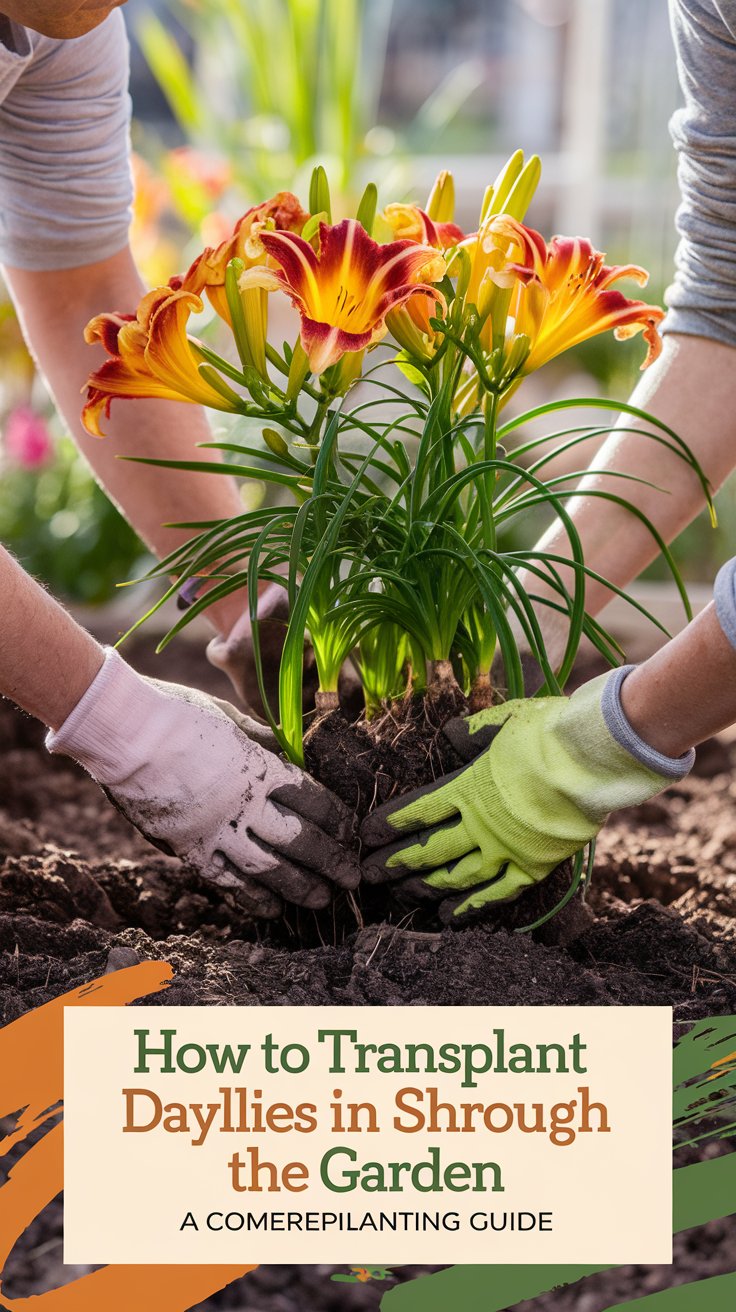
Learn how to transplant daylilies like a pro with our comprehensive 2024 guide. Discover the best times, techniques, and tips for successful daylily division and relocation in your garden.
transplant daylilies is a rewarding gardening task that allows you to propagate these beautiful perennials, refresh overcrowded beds, or simply rearrange your garden design. With proper techniques and timing, you can ensure your daylilies thrive in their new locations. This guide provides expert advice on successfully transplanting daylilies, from preparation to aftercare.
As a horticulturist with over two decades of experience in perennial gardening, I’m excited to share my expertise on transplanting daylilies. Let’s dive into the world of these versatile and colorful garden favorites!
Why Transplant Daylilies?

Before we get into the how-to, let’s consider the reasons for transplanting daylilies:
- Propagation to expand your collection
- Rejuvenation of older, less vigorous plants
- Controlling the size of established clumps
- Redesigning your garden layout
- Sharing plants with friends or fellow gardeners
Now, let’s explore the process of transplanting daylilies step by step.
/mexican-heather-plants/
Step-by-Step Guide to Transplanting Daylilies

1. Choose the Right Time
Why It’s Important: Timing significantly impacts the success of transplantation.
When to Do It:
- Early spring when new growth is just emerging
- Late summer to early fall, at least 6 weeks before first frost
2024 Trend: Climate change is shifting optimal transplanting windows in many regions. Local extension offices can provide up-to-date advice for your area.
Pro Tip: In warmer climates, fall transplanting allows daylilies to establish roots before the next blooming season.
2. Prepare the New Location
Why It’s Important: Proper site preparation ensures healthy growth in the new location.
How to Do It:
- Choose a spot with at least 6 hours of direct sunlight daily.
- Amend the soil with compost or well-rotted manure.
- Ensure good drainage by elevating the planting area if necessary.
2024 Update: New soil testing kits are making it easier for home gardeners to optimize soil conditions for daylilies.
Pro Tip: If transplanting multiple daylilies, prepare the new locations before digging up the plants to minimize stress.
3. Dig Up the Daylily Clump
Why It’s Important: Proper digging preserves the root system and facilitates division.
How to Do It:
- Water the plant thoroughly a day before digging.
- Use a garden fork or spade to dig around the clump, about 6-8 inches from the base.
- Lift the entire clump carefully, preserving as much of the root system as possible.
2024 Innovation: Ergonomic digging tools designed specifically for perennial division are gaining popularity.
Pro Tip: If the clump is large, you may need to divide it in the ground before lifting to make handling easier.
4. Divide the Clump (If Necessary)
Why It’s Important: Division rejuvenates plants and allows for multiplication.
How to Do It:
- Shake off excess soil to expose the root system.
- Look for natural divisions in the clump.
- Use a sharp, clean knife or spade to separate the clump into smaller sections.
- Ensure each division has at least 3-4 fans (sets of leaves) and a good root system.
2024 Research: Studies are exploring the optimal size of daylily divisions for quickest reestablishment.
Pro Tip: Dip your cutting tool in a dilute bleach solution between cuts to prevent disease spread.
5. Trim the Foliage and Roots
Why It’s Important: Trimming balances the plant and reduces transplant stress.
How to Do It:
- Cut back the foliage to about 6-8 inches.
- Trim any damaged or excessively long roots.
2024 Trend: “Root pruning” techniques are being refined to promote faster root regeneration after transplanting.
Pro Tip: Use clean, sharp scissors or pruning shears to make clean cuts and prevent tearing.
6. Plant in the New Location
Why It’s Important: Proper planting depth and spacing are crucial for daylily health.
How to Do It:
- Dig a hole twice as wide as the root ball and deep enough to accommodate the roots.
- Create a small mound in the center of the hole to spread the roots over.
- Position the plant so the crown (where roots meet foliage) is about 1 inch below soil level.
- Fill in with soil, firming gently to eliminate air pockets.
2024 Update: New slow-release fertilizers specifically formulated for transplanted perennials are showing promising results.
Pro Tip: Space plants 18-24 inches apart to allow for future growth.
7. Water Thoroughly
Why It’s Important: Proper watering helps establish root-to-soil contact and reduces transplant shock.
How to Do It:
- Water deeply immediately after planting.
- Keep the soil consistently moist (but not waterlogged) for the first few weeks.
2024 Innovation: Smart irrigation systems that adjust watering based on soil moisture and plant needs are becoming more accessible for home gardeners.
Pro Tip: Apply a layer of mulch around the plants to help retain moisture and suppress weeds.
8. Provide Aftercare
Why It’s Important: Proper care in the weeks following transplantation ensures successful establishment.
How to Do It:
- Continue regular watering for the first growing season.
- Hold off on fertilizing until new growth appears.
- Monitor for signs of stress or disease.
2024 Trend: Mobile apps for tracking transplant care and progress are gaining popularity among gardeners.
Pro Tip: If transplanting in late summer, apply a layer of mulch after the ground freezes to prevent frost heaving in colder climates.
/kaleidoscope-abelia/
Best Practices for Transplanting Daylilies
To ensure the best results when transplanting daylilies:
- Label varieties before digging if you’re moving multiple types.
- Avoid transplanting during the hottest part of summer or when plants are in full bloom.
- Consider the mature size of each variety when choosing new locations.
- Rotate daylily beds every few years to prevent soil depletion.
- Keep detailed records of transplanting dates and plant performance.
/variegated-mezoo-sun-rose/
Nurturing Beauty Through Transplantation
Transplanting daylilies is a wonderful way to reinvigorate your garden and expand your collection of these beloved perennials. With proper technique and care, you can ensure your daylilies will thrive in their new locations, rewarding you with vibrant blooms for years to come.
Remember, gardening is a continuous learning process. Each transplanting experience offers new insights and opportunities to refine your technique. Embrace the journey and enjoy the beautiful results of your efforts!
For more information on daylily care and gardening techniques, visit resources like the American Daylily Society or your local horticultural society. Happy transplanting, and may your garden be filled with the vibrant colors of healthy, thriving daylilies!
For more gardening tips and plant care guides, visit usagardenhub.com.
